Thursday 14 March 2013

Blocks Galore


For the last couple of weeks I've had a temporarily homeless friend sleeping in my Studio. While it has been great having him around, it has meant that I don't have anywhere to get stuck into a sewing project and leave it in progress.

The solution?

A truly massive project in twenty little bites - Craftsy's Block of the month 2012 The class walks me through a total of twenty blocks, so watching the video then sewing one (or two) blocks using the techniques taught in the video is a manageable project that I can clear away in time for my house guest to go to bed.

I'd already tackled January and one of the February blocks, but the other February block was a bit challenging. I thought I'd got the half square triangles sorted but the first block only used half square triangles. I didn't realise that I had ended up making them a little larger, but when I came to include plain blocks in the design it was rather obvious:


It took a lot of shoving, heaving and swearing to get the pattern looking right, but the seams are far from perfect. I'm kind of hoping that once it's all quilted and drowned in a sea of other, far better blocks, that I won't notice this one (Like, who am I kidding - it'll be the first one I notice)
Once I'd done that I moved on to Amy's string blocks, and they were fun. Her instructions were to use random strips of fabric of differing widths. I'm not sure how random mine were. In essence they were all the width of my long ruler, but I started off with plain black because I really like the look of the star so I wanted it to stand out. From then on in it was random, and I figured that it didn't matter if they didn't line up perfectly, since they were supposed to be random.

I was sooo pleased with myself at actually getting a star shape in the middle, I decided to be even more ambitious for the second string block and try and make it deliberately uniform.  It took a total of twelve seams, stiching and unstitching to get this lined up, and I’ve now decided that, although the seams line up pretty perfectly, it still looks random, just ‘cos of the nature of the prints.
 
Mind you, I’ve now done six blocks and am getting a feel for what the finished quilt will look like:

I think I like it.  They are now all pegged up on my studio wall, even when the house guest is in there. I'm sure he'll tell me if it gives him a headache.


Sunday 3 March 2013

Project 6 - the quilt

I never expected this one to be done in one sitting, but I have made a start.  I'm basing this on a Craftsy course Block of the Month 2012.  Yes, I know it's 2013 now, but my intention is to work through Amy Gibson's 20 blocks and then decide whether to make it into a quilt, or move on the 2013 block.

Anyway, the January (2012) blocks were both based on slashed blocks and I was very impressed by how easy Amy made them:
Asterisk

Wonky Pound Sign
 I've decided (at least for the moment) to use a black and white pallet, probably added greys at some point, and maybe even the odd red if I feel that it needs it.

It will either make a very striking quilt, or one that gives me a headache every time I look at it!  Watch this space.

I have also done one of the February blocks using half square triangles:
Balkan Puzzle


I'm wondering how well the various black and white prints will contrast as the quilt progresses, so I may end up varying the colours a bit more.

I was surprised how well my half square triangle came together.  I used Amy's "Magic Half Square Triangles"  to make up the squares.  I'm a bit handicapped by not having a cutting wheel thing and a cutting mat, so I end up drawing the cutting lines with a set square and ruler and cutting the the lines with  a pair of scissors

Project 5 - Straw hat rescue

This was inspired by my lack of a hat in Queensland and my Mother's Christmas present to me - 
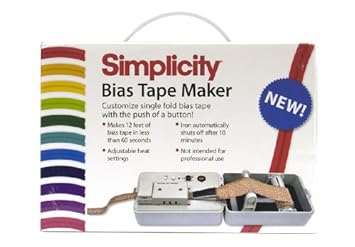
I know, it looks kinda weird, but it really makes custom bias tape a 30 second job, and it looks really professional without burning your fingers.  Obviously I had to find a use for it while I was still with Mum so she could see it in action.

Not used to the heat of Queensland I had neglected to bring a hat with me, which soon became a problem.  Mum found a hat I had left at her place a few years ago when the whole family had gone over and we gone to "The Outback Experience".  It was a tourist attraction (so what? we were tourists?) and came with a branded hat:
My Dad and I at "The Outback Experience"
While it was a fun evening, the hat wasn't something that I felt fitted into my everyday wardrobe, so it had been sitting at the back of one of Mum's wardrobes ever since.

Every time I came over she reminded me it was there, but I usually remembered to take a hat that didn't scream TOURIST quite as much as this one.

Over the years it had become rather scruffy as well as still screaming tourist, so I decided that I'd use the bias binding machine and a little craft glue to spruce it up and disguise it's origins

I found a black cotton with a small white flower print in Mum's stash and started by removing the inner band and gluing a piece of the fabric to the bottom of the hat:
I let it dry then cut out the whole in the middle, clipped the circle right back and glued the edges down
I then stitched the band back in the inside. 

I'm sure I took photos of the next bit, with the band back in, but I can't find them any where!  


Anyway, I made a long strip of bias binding (with the machine, obviously) and stitched it round the outside of the brim and replaced the external band with one matching the underside of the brim.

Low and behold, a revamped hat, with no hint the "Outback Experience" branding on it.

I'm still not sure I'd wear the hat if I didn't need to, but I didn't feel so embarrassed wearing it for the rest of my holiday.

I Pod case

I've not been as good as I should have been over my 52 projects, given that I'm into week 9, so should have been onto my ninth project by now.  However, all is not lost.  I have made some progress on the list: 2,3,4,5 and 51 are actually complete, with 1, 6,13, and 16 started!  However, I have been really bad about blogging them.

Starting with Number 2 - the IPod case:

 I used this project as a opportunity to try out a few embroidery designs - initially a rather pretty dragon fly and some flowers that fitted quite nicely on the flap.  


After the pretty girly stuff my daughter wanted me to stitch out a design she had chosen to personalise her lab coat for Uni (she's a science undergraduate).  There were more flowers and butterflies, but the design she had chosen did have a more macabre element to it.
The case is lined and padded, to protect my IPod from knocks and scratches, and more people comment on the skull design than the flowers.