Monday 28 May 2012

Emergency sewing

Ok, I give up, I can't go a whole month without a pair of jeans.  Does this mean I'm giving up on MMM12?  Not at all.  I just need to make some jeans - like now.  I have two possible fabrics in my stash.  One is a classic blue denim and the other a white denim-weight cotton with blue and green flowers.  Much as though I love the blue and green flowers:

There are several compelling reasons to use the denim
1. I need something casual and the print wouldn't be truly casual jeans
2. I really like the print and have never made jeans before so I'd rather perfect jeans before I cut into the print.
3. The print will make a very summery pair of jeans and it's definitely winter here now - I'm even using the electric blanket.
4.  Jeans pocket seems like an ideal opportunity to play with the embroidery machine again, and the blue denim lends itself to that more than a print.

I've not bought many patterns lately, especially since I started the pattern drafting course at the local high school, but I decided that I needed a lot of guidance with this.  I've had quite a bit of success with McCalls, so I bought McCall's 5894 which was described as "The Perfect Jean".  It's higher waisted than most of my jeans, but was described as below the waist.

Of course, I couldn't resist a little bit of embellishment on the pockets:

The pattern has very large seam allowances to allow for fitting adjustments, but I still found it hard to get a good fit.  I'm not incredibly happy with the fit, but I only pre-washed the denim once so I'll let them go through the wash a couple of times before I pull them apart and tweak the fitting.

I didn't do flat-felled seams, but I did double rows of top stitching on the outside leg as well as round the pockets.

I studied several pairs of RTW and it seems that most of the women's jeans I examined had the fancy topstitching down the outside leg, while the men's ones I found were topstitched on the inside leg seem.

Overall I liked the pattern, it went together easily and was true to RTW.  I will use it again, but in future I will put the topstitching on the inside leg then adjust the fit on the outside leg.  I will also make them a little tighter.

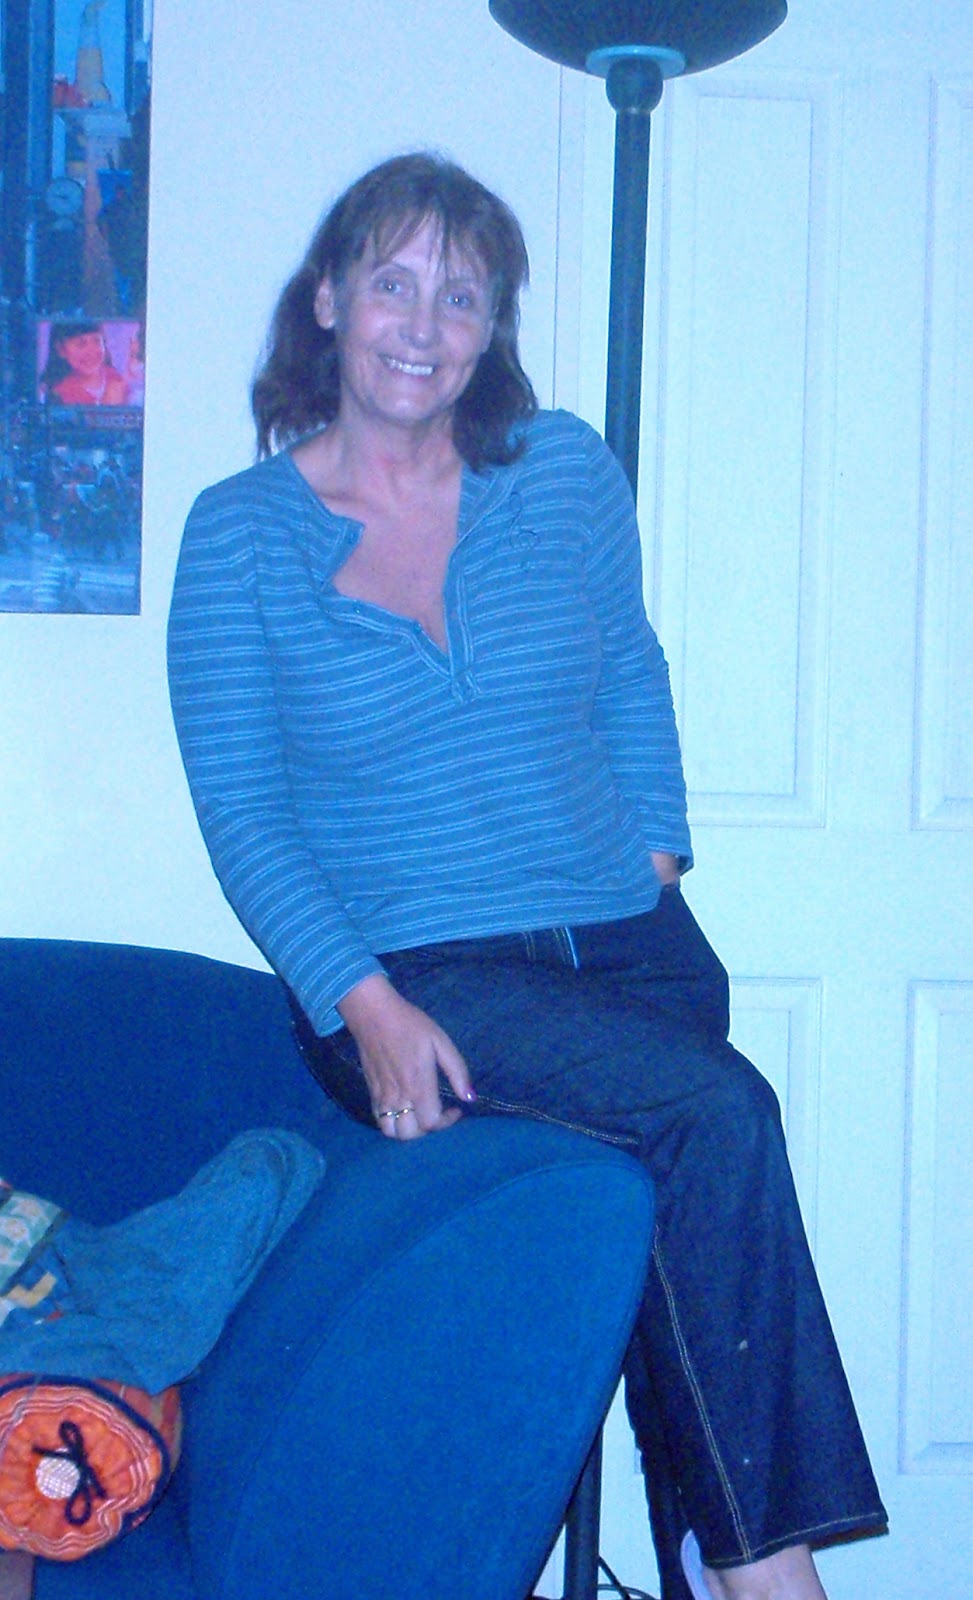
I now have the jeans and T shirt option available without giving up on MMM12 - this was my Monday outfit.

Saturday 19 May 2012

MMM12 - Day 18, and my first embroidery project

This is today's outfit.  Black and white T shirt, Black pants and a new black and white jacket.  The pants are my standard, "go to" pant pattern, Very Easy, Very Vogue, V8157.  I can't find it on Vogue's site now, so I guess it is out of print.  The T shirt is my standard pattern, taken from an old favourite moments before it died.

The jacket is new, and the reason that I picked the rest of the outfit - I wanted to wear my new jacket.  It's based on and old Burda Magazine Pattern (March 2007) that I made up in red and black and wore on day 5. This time I made it in plain white, but I let the new embroidery machine loose on it.  I placed a single swirl pattern all over the bodice pieces.  I need to be able to get the fabric in the machine hoops, so most of the embroidery had to be done before I actually cut the pieces out.  I drew round the pattern pieces on the fabric, then placed the swirl pattern (remembering to make each pattern a mirror image of the one on the other side), then cut out the pieces.

As I completed each piece I pinned it onto my dummy so I could see what it would look like.

One of the most challenging pieces was the back:
Getting the patterns to almost intertwine, but not quite took a lot of swearing and several aborted pieces.

By the time I got to the sleeves I was well and truly over the embroidery so convinced myself that the sleeves didn't need embellishment.

Finally I lined it with an over sized polka dot lining:


Yes, It's over the top, hopefully not too crafty but definitely unique.  I went to the supermarket and three people commented on it. 

Friday 18 May 2012

MMM12 - days 16 and 17

Day 16 saw me teaching again - just a day's relieving - so I wore one of my favourite "teaching" outfits.  I don't tend to sit down much when I teach, and this skirt swirls beautifully when I move.  It's an out of print Butterick pattern.  I've made both the long version, and the shorter one.   The pattern piece (yes only one piece and a waistband) looks really weird and I was reduced to following the instructions and matching up all the notches.  It's a bit like an Agatha Christie novel.  Lots of clues to follow, but none of them make sense until the final chapter when Miss Marple gathers all the suspects in the drawing room for sherry and WOW, lo and behold, a skirt!  It's comfy to wear and does move nicely.  My only gripe is the zip, which ends up diagonally across the bootee.  When I made up the shorter version I slashed one piece and inserted the zip straight down the back, which works better (IMHO).

The top is from Burda Magazine (again).  It looked really interesting in the pictures, but not at all flattering on a bust when it was made up.  I guess the model wasn't an hour-glass figure.  I ended up stitching down all the pleats to stop them gaping open, which improved it no end.

Today I went to a friend's for lunch.  She's got two very boisterous two and a half year old boys and a great Dane who thinks she's a lap dog, so I went for a real wash and wear dress.  

This dress was a mongrel of two patterns and a little lateral thinking.  The bodice is my basic T shirt pattern with a round neck (yes, I said round, read on) the skirt of the dress is from Burda Magazine, which I wore on day 15.  I then added the ties at the seam between the bodice and skirt.  When I wear it I bring the tie on the inside under my bra, so that the bodice is, effectively tied to my bra.  It gives the illusion of a great fitting sweet heart neckline and doesn't ride up or move at all.  My original intention was to make the whole dress out of the Lycra print, but I didn't have nearly enough fabric, so I added the black bodice and centre panel.  In retrospect the mix works better, and is actually very flattering.  The greatest thing about this dress is that it is machine washable, dries really quickly and never needs ironing.  I've actually put aside another, similar print in black and white to make another one, only with sleeves.

Of course, this is one of my many pending projects, which is what I call those items in my fabric stash that I have a plan for.  That way, my fabric stash appears smaller, since about half of it is actually pending projects instead.

Thursday 17 May 2012

Me made May - Day 15


To day was a fair amount of running round Auckland - collecting a repaired computer, dropping of shipping and lunch with a friend's mother.  I had forgotten about this dress until I saw a very similar one on pattern - scissors - cloth (wow, another blogger in Auckland!) At first I thought it was the same but mine came from October 2006 Burda,while hers came from May 2009. Despite the differences, it reminded me that I like this dress and hadn't worn it for a while.  This is another one that would stand repeating, especially since I made it up in a fairly distinctive print the first time.

Since it was swinging wildly between sunshine and rainstorm all day, I had to wear a jacket just in case.  I made this trench jacket from March 2009 Burda, and I'll admit it was fiddly to make, but I was quite please with the end result, although I made it in linen, so I needs to pass close to the iron every time I wear it to avoid that "slept in" look.

One of the things I was most happy about was the lining, which was a co-ordinating print.  I love slightly different linings.  I think that it makes a jacket look much more expensive if the lining has taken thought too.  This wasn't a proper lining fabric, but I loved the colours and they looked good with the linen.

Looking through my MMM12 posts it looks as though everything that I sew comes from old Burda Magazines, which isn't quite true.  I do use a lot of Burda patterns because I have get it every month and I like the patterns with no seam allowances.  However, I also have three boxes full of the big four patterns, which I also use.  I guess I don't use them as much as as I think I do.


Wednesday 16 May 2012

Me Made May - Days 11 to 14

Last weekend was another diving weekend, but this time it was a Live aboard, trip, so fourteen of us spent the whole weekend on a boat.  While I was able to sneak off to a quiet corridor to set the self timer up and photograph last weekend's outfits, this was never going to be practical on a boat, so this is what i took:  A different thermal top to wear under my dry suit.  


This one has passed near the new embroidery machine.  It was very loosely based on a Burda Magazine top, from January 2009 (125).Burda 1-2009-125 again.

I took the same leggings as last week.

I also took one of my standard T shirts to wear under the thermal top:

In case it got cool in the evening I also added a cardigan that I knitted last winter when I was trying to teach myself to knit lacey stuff.  I didn't have a pattern, just sort of made it up as I went along.

I was generally happy with the cardigan, but I still haven't mastered button holes, so rather than spoil it with crappy button holes I put two feature buttons on the front and crocheted a loop to join them. 

It was warm and sunny when I drove to the harbour so it was probably shorts  and T shirt weather, but I really don't feel that shorts do me any favours at all - my thighs look enormous.  As an alternative I tend to chose casual skirts, so I wore a denim skirt (made from my standard skirt block) and another attempt at lacey knitting (again, no pattern)

I came home on Monday morning and went straight to work, and didn't photograph the outfit, so this is it, another make of the very old New Look 6454, although I only made this one quite recently.  The top is from Burda, March 2007.  I've made a few of these, but I usually alter the top half of the bodice.  I've discovered that if I cut the upper bodice pieces on the fold down the centre front line I can then make the tie a separate piece.  Why?  you ask?  When I tie the knot I bring the inside piece of the tie UNDER my bra, so that the knot also ties the top to my bra.  The obvious benefit of this is that the top doesn't ride up, but it also adapts the neckline according to the style bra that I am wearing.  I plunging bra will produce a plunging neckline, while a more conservative one will produce a work-appropriate top.

Today I'm wearing one of the first pairs of pants that I made with another Burda top. The pants have pleats at the front and when I made them i had more of a waist than I have now.  I still wear them, but looking at these pictures they are not especially flattering.

The top is another Burda one, the only one I've made from this pattern, but when I put it on I decided that I quite like it - I see a few more of these in the future - I've got some red Lycra that would look good in this design.  

I topped the pants and T shirts with a garment that was originally supposed to be a dress, but half way through making it I realised that the fabric was see through.

I changed the design direction to this duster jacket.  Interestingly, I have had more people comment on this dress/duster jacket than any other garment that I have made.  It does do a great dramatic flowy thing when I walk.


Friday 11 May 2012

MMM12 - Day 9 and 10


Day 9, and my plan is to go for a walk, then start cataloguing my fabric stash.  I'm going to photograph each piece of fabric with a piece of paper showing the length.

Doing the MMM12 challenge is showing me that I the clothes that I make are not the ones that I wear on a day to day basis.  I may not like the fact that I don't have a job, but it means that I tend to wear jeans and track pants most of the time.  These pants came from Burda, June 2009.  Not only are they not flattering, but they tend to need constant adjustment to stop them falling down.  The T shirt is from my standard T shirt block, taken from a RTW t shirt.

I made this ensemble as a yoga outfit, drafting the pants myself and using a Burda Pattern from June 2008 for the T shirt.  It's comfortable, but not flattering.  It was also one of the few outfits that I had that met the needs of today (doing nothing in particular at home) and the Me Made criteria.  I have a host of suits and skirts and dresses, but since I was made redundant most of them are not appropriate for day to day wear.  

Even if I was offered a job tomorrow I'd still have a gap in my Me Made wardrobe for weekend wear.  Last night was my pattern making class, so I copied the teachers instructions for drafting Jeans.  I'd like some well fitting jeans, and they would fit into my life better than endless lovely dresses, especially in the winter.

 In this picture I am knitting a set of cuffs for a casual hooded jacket that is in my plan:
The main fabric is a denim-weight cotton with a fun print of faces all over it, which I am planning to line with a pale grey T shirting fabric.  Since I want the jacket to be wind proof I was going to put some black ribbing round the wrists, but then came along this black-white-grey wool and I decided to mix my materials up a bit and knit my own cuffs.

Another weekend away, so the same old thermal undergarments will be trotted out for diving, but I'll have to think of another Jeans alternative.

Having two days with nothing to do I did manage to finish preparing the pieces for another version of the Burda Jacket that I wore on day 8.  The first version was black with red topstitching.  This time I've chosen a plain white linen but embroidered black swirls all over it.
 I'm not sure about this one - I'm warey of using the embroidery machine to over-do the embellishments, but it does look quite pretty.

Thursday 10 May 2012

Me made May 12 - Day eight

Today's outfit was another version of a very old A line skirt from Simplicity, a self drafted tank top and a jacket from march 2007 Burda.  

Although it's been in my wardrobe for a while I like this jacket .   In fact, I'm using the same pattern to show case the new embroidery machine on my current project: A plain white linen jacket with a black swirly pattern embroidered all over it. 

I've got a white dot fabric to line it with, but it was surprisingly hard to get all the swirls in the right places - still a work in progress, but I'm enjoying it,

Monday 7 May 2012

Made Me May, day 5, 6 and 7

OK, this has to be the LEAST flattering picture that I will post - my scuba diving outfit!  I actually dive in a dry suit, which, for the non-divers, is like diving in a big plastic bag, so I wear thermal underwear to keep me warm, and actually stay dry while I dive.  For technical reasons to do with pressure at depth, the underwear has to be simple, close fitting with as few zips and buttons as possible.  Hence this monstrosity.  All I can say is that almost everyone at the dive lodge is wandering round in thermal underwear, so I didn't look nearly as odd at the lodge as I do here.

As an added Me Made Bonus over the weekend, I took several pairs of me made knickers/underpants - no model shots, but all garments are worn over these.  

They were reverse engineered from my most comfortable pair - 1/2 a meter made four pairs!
The less than flattering pictures continue with the closest I have ever come to jeans:

I have never been very happy with these cargo Pants (Burda December 2009),


For some odd reason the pockets always gap and give the impression of huge hips.

However, I would have looked really odd wearing a dress at the dive lodge, where the dress code is really casual.  A few years ago I drove up straight from work in a suit, and the lodge "mother" who I have known for AGES didn't recognise me.  So my nearly-jeans had to come out.  I've seen a few bloggers who have made very successful jeans (Amy and struggles to sew a straight seam spring to mind) recently so I might try again, but not with  this pattern.

I am wearing them with a top from the same magazine (121) which was much more successful.


As a final outfit for my first week of MMM12 I was helping paint a friend's living room, and I do draw the line at photos of me painting, however, here are the overalls which were made from an eighties Burda magazine, I can't recall which one.  They have recently, however, had a quick up date with the new embroidery machine!


That lace knit and MMM12 day 4

Every one I know has seen me knitting this top.  It was supposed to be an Equinox Top made with some Sirdar Pure Bamboo yarn that was on special at a local wool shop.  I followed the instructions and then neck was really high and frumpy looking.  Two thirds of the way through  this top I decided that I didn't like the way it was shaping up so unravelled it and redesigned the neck before starting again.  I did finish it this time, but months of handling, the "white" yarn, was lookiong decidedly gruppy.  The label on the yarn said machine washable, so I popped it in the machine with the regular wash, and out came a perfectly white child's T shirts!

I did nothing for a few weeks, then I unravelled it and started again.

When I finally finished it, it looked...well...ordinary.  Rather than redesign the whole thing and knit it up again I threaded a few bits of black ribbon and put it on to drive north for a weekend.  
I am so over this jumper now.

So this is now my Me Made May 12 outfit for Friday, that **** knitted top and the first skirt I made from my skirt block.

Friday 4 May 2012

Me Made May 12, day 3 and finishing the elephant

It was a family dinner today, so I pulled out an old favourite.  This teal wrap dress was based on a full length overdress from Burda Magazine in January 1999 (yes I have them from that far back).  I shortened the dress and sort of melded the top and bottom pieces to eliminate the waist seam.

It's getting quite chilly in the evenings, so I put a Jacket over the top - also from Burda Magazine, this time May 1999.  Again this pattern was adapted - the original was a full length coat.   The fabric was actually curtain fabric , but not thermal lined.  I loved the colours so disregarded the fact it was curtain fabric - I just hope I never meet someone with the curtains! 


My main reason for going with the green dress for this evening was that I bought a new pair of shoes the other day.  I had seen them and loved them earlier in the summer, but they weren't cheap so didn't buy them.  Last week I was passing the shop and they were half price.  I took this as a sign from the gods that I was supposed to have them.  They are rather high heeled, so I can't actually walk very far in them - more practice needed I think.

Since I would be seeing my ex at the dinner I was motivated to finish his trousers (the elephant Project)  despite my cunning strategy of breaking the project down into manageable chunks, I had still had procrastinated and hadn't finished them.  I had got engrossed in a jacket covered in embroidery (using the machine that Mum gave me) and was seriously lacking enthusiasm for the elephants.  Fortunately i had fitted them and made the required adjustments so I was able to get them done before the dinner.  He seemed pleased, and at least I can get back to the jacket, which is looking quite...er... unusual at the moment.

I'm heading North this weekend - hoping to get do some scuba diving (I have a me made outfit for that) and I've offered to help my buddy paint his living room while I'm up there. Me Made overalls packed - pictures to follow.

Wednesday 2 May 2012

Me Made May 12, day 2

Day 2, and I've got to wash my car and take it for a new tyre and warrant of fitness.  Despite that, I've chosen a cream and brown collection.

The pants are from Burda Magazine again, this time 106 from May 2008.  I wasn't especially happy with the pocket flaps on these; They seem to point a metaphoric arrow at my hips, but other than that they turned out OK.  Looking at the picture I realise that the print pants with a print top look a little busy.

The top was self-drafted from my basic T shirt pattern and then slashed into strips and overlocked back together on the outside.  Not quite sure that it worked - probably would have been better with a plan fabric.

Me Made May 12

The first day of the Me Made May 12 challenge: It was surprisingly difficult to get dressed this morning.  Jeans and T shirts have become a dangerous habit.  I eventually settled on a T shirt and an A line skirt.

I can't remember quite how old this skirt is, but it was the first version I ever made of New Look 6454.  I have a photo of my little girl's first day at school and I'm wearing it.  Since "little girl" is now at Uni, it must have been at least 13 years ago, and I have made this pattern up more times than I can count.  I suspect it may be out of print now, as that pattern number is an evening gown on the Simplicity/New Look web site.

The top is a Burda Magazine one, from January 2009 (125).Burda 1-2009-125

I had to take the photo myself with the self timer, and only now do I realise that I look as though I only have one leg!

After a few weeks of playing with Mum's embroidery machine I decided that I needed help and was delighted to find a shop in Papatoetoe that offered one hour one on one lessons on the Janome machines for only NZ$20.  Papatoetoe is the other side of the city for me, but it was worth it.  I came back with all the problems that I had magically solved, and bursting with inspiration.  I've left the elephant project on the side for a while now, but I can feel an elaborate embroidery - based project coming on!

Tuesday 24 April 2012

Eating elephants - bite six


I have been remiss in posting, but I have installed the fly zipper and facing, using the tutorial from hot patterns.  I went as smoothly as it did the first time I used this, until I realised that the tutorial was based on a woman's garment - men's openings go the other way round!
 
 I've decided to leave it the wrong way and hope no one notices.  Undoing it would be a real pain, and probably damage the fabric at the centre front.  Other than being the wrong was round, it work well, and the zip is nicely concealed from view.  The next step will be to put it together so that I can fit it before continuing.


Tuesday 17 April 2012

Eating Elephants - bites four and five

I've now caught up with my schedule for sewing these men's pants.  The Ex is taking my car for its annual test at the end of the week, so I should be able to fit them when he drops it back.  (if "still being friends" means that I still sew his trousers, then I figure it also means he still deals with my car) 
Since my photography skills are decidedly dodgy, the fabric looks rather grey.  In fact, it's a dark olive green.  The bound pocket is not as neat as would have liked, but I ended up having to do it several times anyway, so I figure that's as good as it's going to get.

The next bite is the fly area.  I always hated installing zipper fly front, but last time I needed to install one I found a great video tutorial from Hot Patterns on YouTube.  I will admit that watching the tutorial it didn't seem to make sense, but when I played it while I was actually doing it, pausing the video as I completed each step, it worked, and was undoubtedly the best zipper fly front I've ever done.

I won't say that I'm an expert now, but I've saved the video to my I-pod so I can repeat the same process every time I need to install zips like this.  Hopefully I will reach a point when I don't need to watch the video every time.

Monday 16 April 2012

Eating elephants - bites two and three

Having got side tracked by a new T shirt for my sewing chair, I figured I'd better get back to the elephant project.  I realised that I'd got bites two and three in the wrong order.  it makes much more sense to sew the darts and pleats BEFORE I overlock all the pieces.  Since I haven't bitten anything off this project for three days I figured I might as well jump in and do both.  

One of my all too frequent mistakes is forgetting that two sides need to be mirror images, not identical.  I was determined not to make that mistake and copied all the markings onto both pieces as mirror images.  Of course I forgot that men's pants usually only have the bound pocket on the right hand side, and I marked the pocket placement on both sides.  It is only tailor's chalk, so I'm hoping that the marks on the left hand piece will rub off.

I overlocked the pocket piping pieces in half, since that's how I'll fit them.

I'm still a day behind, so I might try and get the bound pocket done later today.  I found a set of really easy instructions   for making a bound pocket, so rather than try to follow the pattern instructions I'm going to work through these instructions.  She's put a button on a flap on hers, but I don't want that so I'll just leave out that bit.

Now I have a pile of prepared pieces for these pants, ready to be assembled.

Side Tracked

OK, so my progress on the elephant project sort of ground to a halt over the weekend.  I had a house project (sewing for the house) sitting in my sewing room for a couple of months, and it was taking up so much room that I didn't really have room to have all my machines out in there.

This rather tied looking chair was a junk shop find for about NZ$30 because I wanted a chair to do my hand sewing and knitting in.  I originally bought it about 15 years ago, and recovered it a vibrant green, gold and purple print.  It sat in the corner by the window for years, with a floor lamp to illuminate my hand work in the evening, although it was in full sunshine, so was an ideal place to work during the day.  

Of course, 15 years of sunshine had taken it's toll on the fabric, and as well as fading the colours, several of the seams were looking a little fragile.  As well as starting to look a little tired, it didn't suit the colours in the new house and so had been stuck in the corner of my sewing room since I moved last October.  

This weekend I finally decided that I'd get it out and give it a new lease of life.  My son likes to watch TV in the dark, so a chair with a localised light was required anyway, and at least I'd be able to reclaim the space in the sewing room.

Last time I recovered it I used a curtain fabric with thermal lining, which was far from ideal.  it wasn't as hardwearing as a proper furnishing fabric and had absolutely no give in it, adding to the stress on the seams.  This time I decided to make life a little simpler and use a stretch fabric.  It was quite a thick Lycra print, which made it really easy to "fit" to the chair, as well as taking the stress off the seams when I sit in it.


I used newspapers to make a rough pattern for the chair pieces and covered the seat cushion separately.  Once I had a snug fitting slip cover I stapled it round the underside and put the legs back on. 

Overall the project should have taken me a day, but I ran out of staples for the staple gun on Saturday evening, so the project was shelved until Sunday morning. 

I think that it looks much better, and certainly a lot more modern, with the new cover, and it has now been installed in the living room with the floor lamp sitting behind it to light up my work.

I'm not sure about the legs - a wonder whether a lick of paint will complete the modern feel, but the legs unscrew so i can always do that at a later date.  In the meantime I have a great place to curl up with my knitting and hand sewing, while still being part of the general activity of the household.  Unlike Karen of Didyoumakethat I like to be around people when I'm sewing.  Even if I don't take part in the conversation, I don't feel so isolated when I can hear the conversations going on around me.  Although I frequently can't resist butting in, even if I'm sewing.

Friday 13 April 2012

Eating Elephants - the first bite

How do you eat an elephant?  One bite at a time.
I'm about to apply the same principle to a sewing project that I've been putting off.
My ex-husband is 6 ft 6, with long legs.  He has always had problems getting trousers to fit, so I used to make his formal trousers, and even on one occasion ventured into men's tailoring with  a full suit.
When we separated we divided everything up in a very grown up and amicable way, and resolved to remain friends.  What I didn't realise was that remaining friends meant that I still had to sew his trousers, until he arrived on my doorstep with a bolt of fabric, a zip and thread.I don't find men's trousers especially easy, and I struggle to work up much enthusiasm for sewing for other people.  Instead of putting it off until the last possible moment then doing a rush job, I'm taking the elephant approach: Cutting it up and tackling it one bite at a time.
  1. Cut out pieces and lining pieces
  2. Overlock all pieces
  3. Stitch and press darts
  4. Sew bound pocket on the right back piece
  5. Attach and top stitch front pockets and lining
  6. Install fly zip and facing
  7. Sew side and inside leg seams
  8. Make belt carriers and tack on to trousers
  9. Attach waist band
  10. Sew loose end on the belt carriers
  11. Sew button hole, button and trouser bar
  12. Hem
That's come out at 12 bites.  It doesn't seem very many for a task that I have always considered a "major" sewing project.  I can't help feel that I've missed something.
Anyway, If I'm right I should be able to finish these in under two weeks just be eating one bite a day.  None of the individual "bites" are going to take long, so I can still have other projects going on that I am actually inspired by, and by overlocking all the pieces at the beginning I only need my ordinary sewing machine out (which it usually is anyway).
Fired with enthusiasm I've alreading crossed number one off the list, I've cut out the pieces.  I'm using a pattern that I have used several times before (I got custody of all the patterns which was probably a strategic mistake) so I've already made the required adjustments to the pattern Burda 8186 , but today's bite and tomorrow's bite (overlocking) are probably the most time consuming.

Me-Made-May '12


I spotted this on So Zo...What do you know and my first thought was that I do this most of the time anyway.  Then I started looking at what I actually wore over the last week, and, despite a wardrobe full of me-made clothes, since being made redundant all I've actually worn is (RTW) jeans and T shirts.  What a waste!  What I need is a reason to actually look in a mirror when I get dressed in the morning.  Hopefully this challenge will get me actually thinking about what I wear each day and adapting my wardrobe for the life I have now. So....
'I, Michelle, of EveryStitch, sign up as a participant of Me-Made-May '12. I endeavour to wear only self made clothes each day for the duration of May 2012.
If I actually have to take a picture of myself everyday I'm more likely to make an effort, so  I will only wear me -made stuff (apart from underwear).

Thursday 12 April 2012

Miley Cyrus's dress

Once upon a time my kids were horrified at the thought of wearing home-made clothes.  While my son is still a label junkie, my little girl has re-branded home-made clothes into "tailor made"  and delights in having stuff that nobody else can afford.  The process starts with a picture:

 
Followed by a fabric, then a deadline - usually only just acheivable.This outfit looked very ornate, and obviously relied on the embroidery and sequins to make it special.  Fortunatley she found a burnt out fabricc at the local bargain emporium (Geoff's Emporium) and didn't want the beads.
The skirt was relatively straight forward.  I have a skirt block for her and used it to make a wide yolk.  Rather than gather the rest of the fabric as has been done on Miley Cyrus' dress I made it a semi-circle piece to avoid too much bulk around the booty.  I also lined the top part of the skirt, but left the rest to show a little flesh throught the burnt out pattern.  
The top was more of a mission.  The one on Miley Cyrus barely covers the subject, and my little girl has more to cover as well.  I made it two parts, a top bodice that had multiple pleats down the centre and side seams and was lined with a heavier cotton, and a lower bodice, which I didn't line, allowing the burnt out effect of the fabric to show through.  It took three calico muslins to get the fit right.  After several nights of cursing my daughter and the fabric we did end up with something that looked a lot like the original.
The top still looks a little brief but she's happy that it was reasonably true to the photo.  I did give her a small bag of sequins to embellish if she wanted to, but I suspect that the work involved in actually sewing them on herself may not be considered worth it.