Wednesday, 15 May 2013

Vogue 8881 - Not project 9


This wasn’t actually one of my 52 projects, but when I came to do project 9 I realised that I didn’t have enough of the grey and black stripe for a whole T shirt, the using the small amount that I had needed to be re-branded anyway.

I also had a small amount of a fine black knit with grey screen printing on it, which actually went quite well with the stripe.  This was part of my $1 stash, which also had heaps of black T shirting in it.

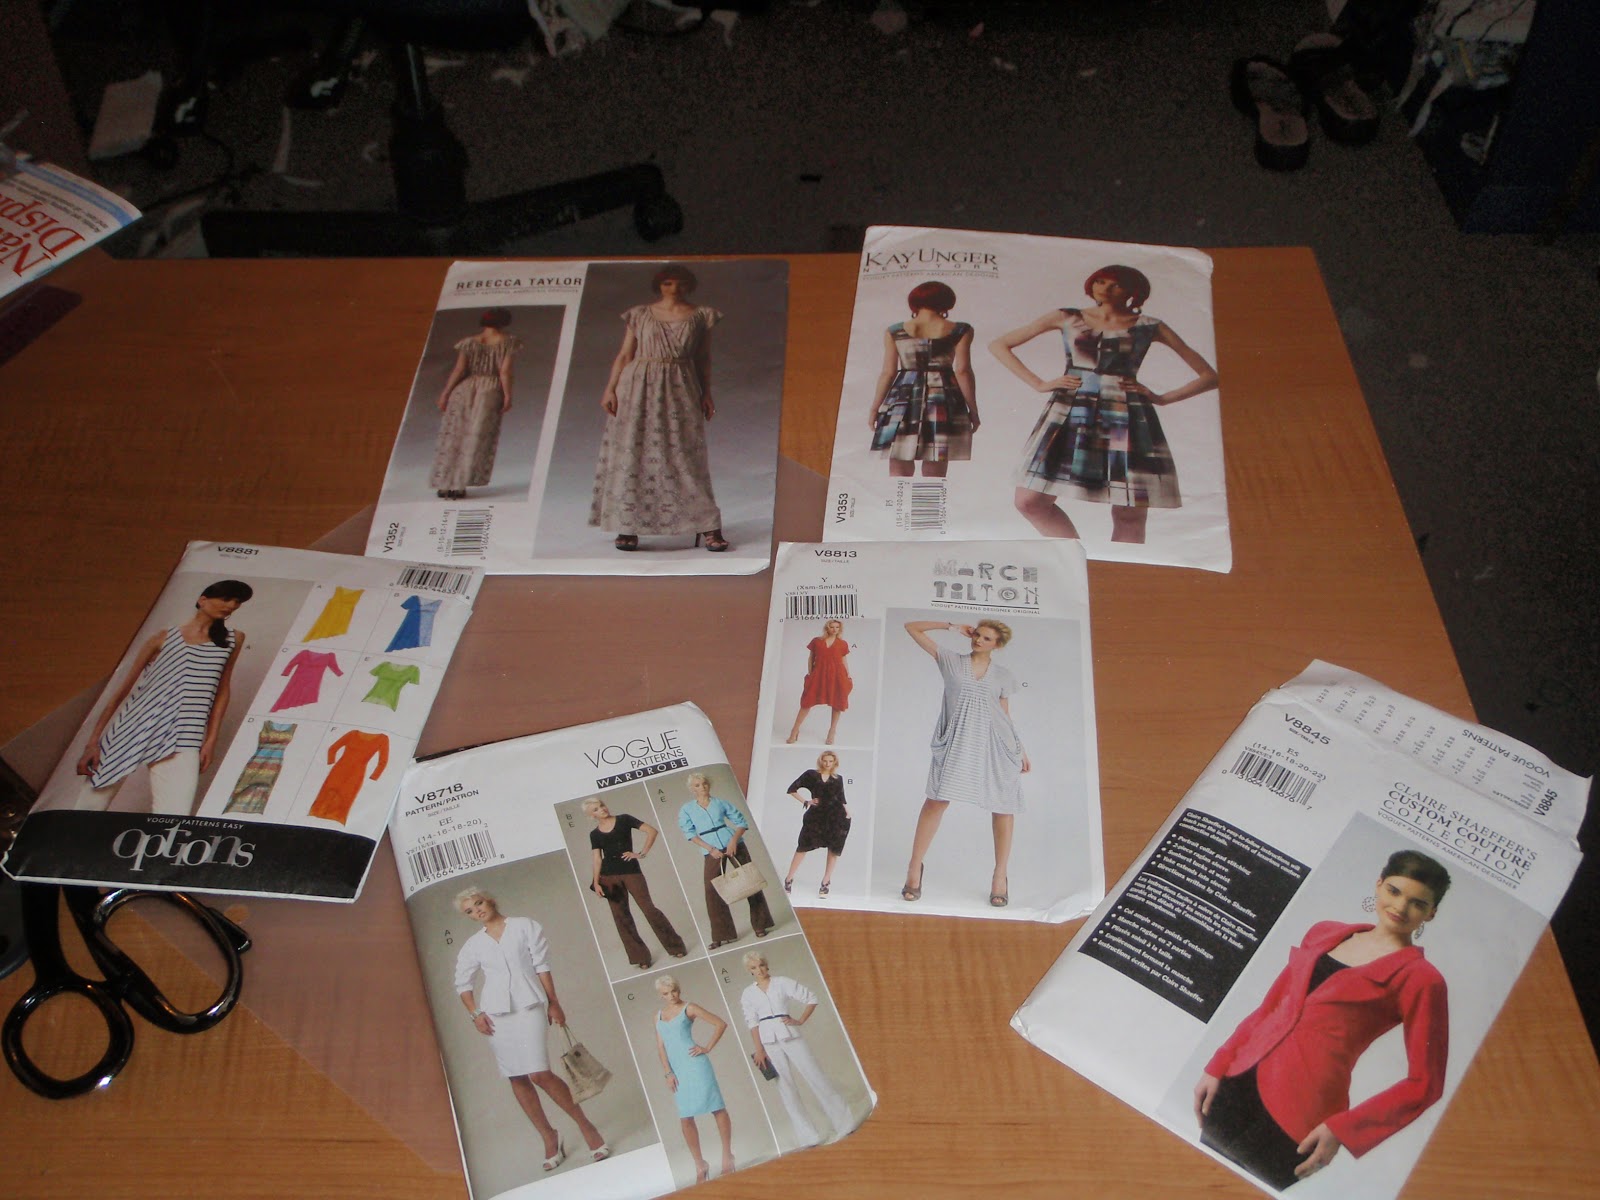
Having been bullied into buying two vogue patterns by a couple of especially pushy pieces of fabric I figured I might as well pick up anything else that caught my fancy since the postage is the major expense of ordering patterns on line here in New Zealand.  Vogue 8881 seemed to have been designed for the few odd pieces I had in black and grey.  Of course, when the patterns arrived I had to jump in and get started on one of them as soon as posible.
 
Matching the two bias cut striped side pieces was a challenge.  After a couple of failed attempts at pinning I resorted to hand tacking the two pieces together from the right side, then sewing the seam on the machine.  It was time consuming, but I’m actually really pleased with how the side seem looks. 
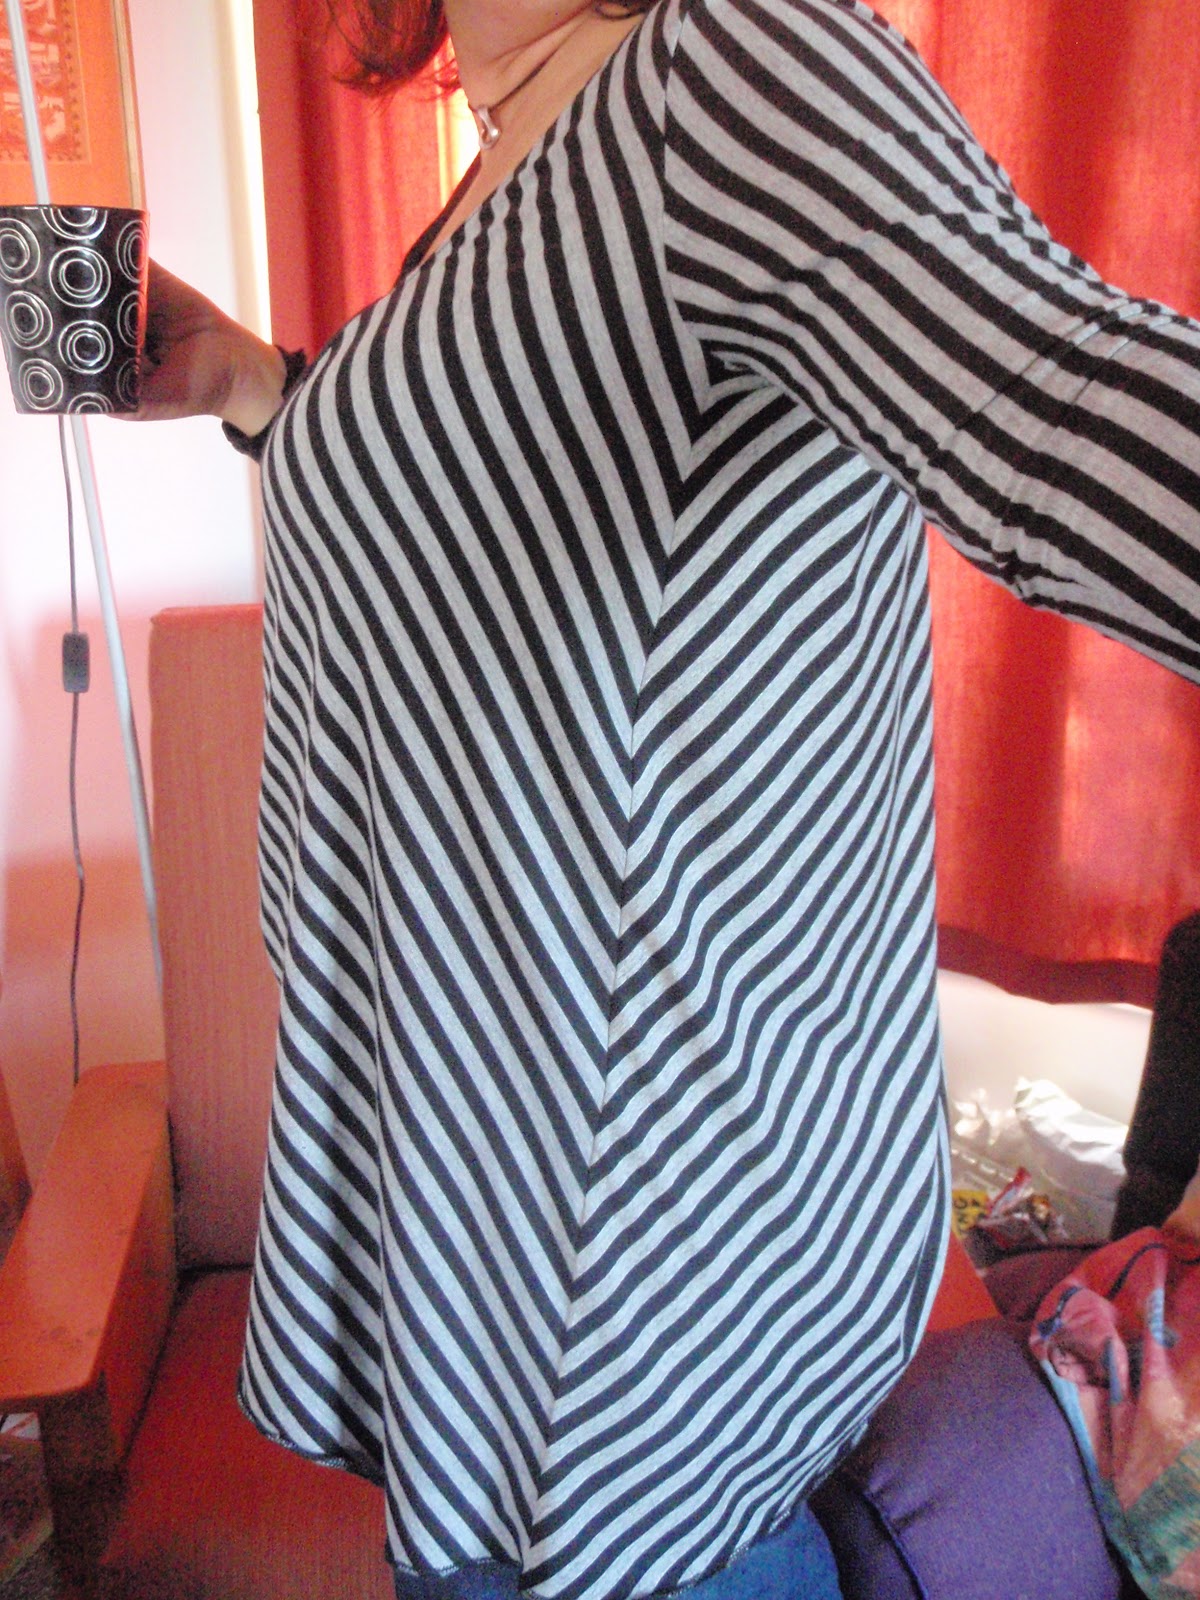

I was a little nervous about the neckline, which is just hemmed.  I’m used to adding ribbing to necklines to keep them sitting against the chest, but the instructions were to hem the neck edge.  While it isn’t as firm as ribbing would have been, it’s quite wearable and I think the finish does look better as a hem.  I overlocked the edges and only turned the hem once, as twice added a lot of bulk.  I also overlocked the bottom edges to keep the flowing thing going.  I think a hem there might have been a bit stiff.

Other than that the pattern went together really well.  I sewed a medium size, although I’m probably a large.  I think that the large might have started to resemble a tent, but the medium sleeves are a little snug.

All in all, I’m very pleased with this top.  It was a genuinely quick make (started it at lunch time and wore it out that evening) which is always satisfying.


Fools Rush in... Project 21

I’m never as confident sewing with lycra as other fabrics.  It seems to slip while I’m cutting it. Slip while I’m sewing it and eject all pins which I may use to try and suppress this tendency.  Having said that, it’s easy to wash, dries quickly and never needs ironing!  I know I shouldn’t be attracted to fabrics according to how much work they will require once they make it into my wardrobe, but I really, really, really hate ironing. 

Anyway, this stuff was bundled up with a yellow version of the print for $8 on trade-me (a NZ version of Ebay), so I figured I could have a play with it.

I started with the idea of a circular skirt with a wrap top on the top of it.  I remembered the formulae involving Pi from school and used my waist as the circumference of the skirt at the waist, less 20% for negative ease, then calculated the radius. 
For the top I used an old Butterick pattern, cutting it off at what I guessed was the waist.

I don’t know what I did wrong with my waist calculations but I couldn’t even stretch it on,  so I added a strip of plain black down the centre front.   

When I then attached it to the body from the Butterick Pattern I discovered that my estimate of the waist was way too high.  The resulting garment sort of looked like a baby doll night dress – too short for everyday wear and it made me look pregnant. 

Since I already had a black strip down the centre front, I unpicked the bodice from the skirt and added more black at the waist line.

 
This time it did fit slightly better, but I’d obviously made the waist piece too wide, and now the skirt flared out from the hip, which was sooooo not a flattering look on me. 


By this time “playing" had ceased to be fun, so a wrinkled up the waist piece to make it look shorter and have the skirt flare out from where I used to have a waist.


I’m far from happy with this, partly because it actually doesn’t look that bad, and it does have a lovely flare.  


 If it looks “not too bad” with such a **** up of a sewing session, just think how good it would’ve looked if I’d actually taken my time and done it properly?
 
Am I the only person who rushes into a project then realised how much nicer it would have been if I’d taken a little more care?

Tuesday, 7 May 2013

Burda sewing


Reading other people’s posts about Burda I seem to have come to sewing the opposite way round to most.  My first sewing experiences were from the Burda Magazines from the eighties.  In those days all I was able to get was the German Language versions, which taught me to manage largely without instructions.  Later on, when the English Language versions became available I realised that the instructions were only slightly more comprehensible in English.  Unfortunately I don’t still have those early makes, largely because I was twenty odd then, and am not now.   I did try the big four pattern companies, but somehow garments always came out HUGE, so I stuck with Burda.  When I started my family I again tried a couple of “normal” patterns.  Again, the resulting garments were huge.  (Of course this is less of an issue with young children’s clothes as they will fit eventually) When I came to get married Mum was determined to sew my dress, but I sewed the bridesmaids’ dresses and waist coats for the men.  It was the first time I’d embarked on a sewing project with anyone else.  So did I learn anything from sewing with my Mum?  Absolutely – I learned that “other” patterns already have the seam allowance on them!  This explained, or course, why the sizing was always wrong.  I was adding seam allowances because I always had.  It never occurred to me that a pattern would include a seam allowance.

Despite solving the major fit issues I still continued to sew largely from Burda magazines.  In recent years I have had brief flings with the big four, and more recently, learning to draft my own patterns. Despite this, some of my favourite makes are still Burda.

This jacket from 2007 has been re-invented in red and black and black and white


Although the curious kiwi was not delighted with this trench

I was


This wrap dress dates back to January 1999

...and I currently have four versions in circulation

Not that Burda is without its share of disasters. 
 
 
These pants never truly worked...

...but I still get every issue, I have sewed something from over half of the issues I have, and now my daughter is discovering them too.

Thursday, 2 May 2013

Does Fabric Talk to You?


OK, I suspect that someone is going to call the little white men in little white coats, but fabric talks to me! 

I don’t typically buy fabric for specific projects.  I enjoy looking at fabric in shops and I do imagine what I could do with it, but I’m just as inclined to fall in love with a fabric and buy it, knowing that, when the right project approaches, the fabric will tell me.  Sometimes it’s easy, the fabric speaks to me in the shop.  This has the added advantage that if I know what I’m going to do with it, I can buy the right quantity.

The black and grey furnishing fabric fell into that category. 
From the moment I saw it in the remnant pile I knew that it would make a beautiful tailored jacket.  I heard it calling out to be something with structure, letting the subtle pattern soften the look.  I questioned the fabric – “You’re a large pattern” I said, “...and you’re only a metre and a half.  What if I couldn’t match the pattern?”   Immediately a second piece slipped out of the pile.  “See, you can have plenty of fabric for pattern matching, and you know you need a black jacket, and let’s face it you’re getting a bit long in the tooth for plain black.  Let our silvery grey tones add a little you to a corporate look.”  I didn’t stand a chance!
Although it's not quite a jacket yet, it made it to the 52 projects, and I have made a start:
and even got as far as starting the pockets...

Other fabrics shout so loud that I don’t immediately understand what they are saying.  This aqua and beige print (part of my $1 haul) offered too many possibilities. 
A jump suit, a dress, a skirt; they would all have worked.  Fortunately I was browsing the Vogue Patterns web site the other day (while they were having a sale) and the fabric was peering over my shoulder when I clicked on V1353 and I felt the fabric (conveniently located in the same room) shiver in anticipation “That’s me, you know that I’d look amazing in that dress” I didn’t dare to disagree

Sometimes I sense that fabrics have something to say to me, but I’m just not getting it.  This black and gold print (one way stretch) was also in the $1 haul. 


Sitting on the shelves with the rest of the fabric it didn’t have a voice.  I separated it and hung it up in my studio where I could see it.  After a couple of weeks of silence I have resorted to draping it over my dress form. 
Still, it’s just not talking to me.  Maybe this one just doesn’t have anything to say to me.  I’m wary of discarding fabrics too quickly, as I’ve made a couple of mistakes recently...
...this ivory crepe stuff came with lining and 1.5 metres of matching lycra, but I disregarded it.  The blonde-on-blond look best suits blondes.  I just couldn’t envisage this material becoming anything that I would wear.  I even took it along to the Auckland Sewing Bloggers meet up, but while other fabrics were happily adopted, this collection was still left at the end.  Still stoically silent, it was neatly folded in my studio when I clicked on V8845


“See”, she said (in a rather condescending tone) “I was never destined for cheap, quick and easy to do projects.  I am a fabric with class, and you will have to invest time and energy to doing me justice.  You know that I’d shine in that jacket and a skirt, if you have what it takes” I realised she was right.  Here she was, having wheedled her way into my stash without my consent, presenting me with the perfect challenge.  She will show every mistake that I make with this jacket; I will never be able to eat spaghetti in her, but if I can pull it off...

At no point did I even consider that the fabric and the jacket are not one of my 52 projects.  I just clicked on “Shopping Bag” and got my credit card out.
Does fabric talk to anyone else, or is this a special talent of mine?

Wednesday, 1 May 2013

Tracing a Burda Pattern


Since today is the first of May and therefore the first day of the Burda Sew-a-long, I thought I'd document how I trace off a Burda Pattern. It's not necessarily the best way, and definitely not the only way, but it's the method I've been using for years.


First, a word about the resources that I use:
Tissue paper - I use the stuff that they sell for gift wrapping. At a couple of dollars a packet it has the advantage of being cheap and very readily available. The down side of tissue paper is that it is very fragile and comes in a standard size - meaning that pieces have to be stuck together.
Paper Glue - I NEVER use sellotape to stick together pieces. The easiest type of glue to use is the stuff that comes in a tube.
Iron - yes, I'm going to iron tissue paper. Make sure that the iron is set to dry and that there is no water in it. If you try ironing tissue paper it disintegrates before your eyes. Also, when you start ironing your tissue paper you will see why I never use sellotape!
A soft pencil.
A felt tip pen - (in these photos I’m using blue, but that’s not a colour I recommend – it’s rather to close to the colour that the sheets are printed in.
Paper Scissors – I keep a pair especially for paper so I am not ever tempted to cut paper with my fabric scissors
Ruler (and possibly a French curve)
My Burda magazine with the pattern sheets carefully removed.
Find your pattern pieces
At the beginning of the instructions there will be pictures of the pieces that you need, and it will tell you which pattern sheet they are on, what colour they are and the piece numbers. 
For the pattern I’m doing I will need pattern sheet B


So I look for the numbers 24 to 27 in red round the outside of the sheet, then follow a line into the sheet until I find the same number, which will be the outline of the piece that I am looking for.  I then outline the piece that I want to trace with the felt tip pen to make it easier to trace off.


I am using a magazine from June 1991.  In the mid 1990’s the pattern sheets were redesigned to make this part of the process a lot easier. Don'f be put off that it looks hard to identify your pieces.  The newer magazines are A LOT easier, but the process is the same

Preparing the tissue paper.

At this point I will be able to see whether a single piece of tissue paper will be large enough. If I need to stick two pieces together I take both pieces and the glue to the ironing board.  I iron the tissue flat, then glue pieces together as required.  I then run the iron over the join to dry the glue quickly.


Tracing the pattern

I use a soft pencil so that I don’t damage the tissue, and carefully trace the lines that I have outlined.  I always include the numbers.  If I can’t see them while I am tracing I refer to the sketch in the instructions – these numbers are a great help if you want/need to operate without the instructions.  I do use a ruler for straight lines and French curve for curves, but this isn’t compulsory.  Mark grain lines, fold lines and other markings and cut out your pattern pieces.


I mark the pattern pieces with my own simple code – this one is 5/1991/119-42.  5/1991 is the date of the magazine, 119 the pattern number and 42 the size.  I also write the piece number and description on each piece, and refer to the instructions for any cutting instructions (e.g. cut 2, cut one on fold, etc.) .  If I have a problem when I’m fitting it I know where the pieces came from.


I frequently trace a pattern off and don’t sew it straight away.  I am a little picky about storing patterns, ‘cos let’s face it, if you’ve got a great pattern, you may want to use it again. 


I store my patterns in A5 envelopes with a photo from the magazine glued to the front.


It then goes into the covered photocopy paper box which is the perfect size for filing all my Burda drafted patterns


OTT???


Ok, a very brief post, ‘cos this is major, majorly over the top. 
I was never sure what I was going to make with this fabric, but it jumped off the bolt in Geoff’s Emporium and said “Buy Me”
So… 

I made underwear out of it.  Sewing under wear – how ridiculous is that?

Thursday, 25 April 2013

Project 20, re-branded


I obviously needed to cut down on the number of Burda Magazine patterns that I’m considering, so I’ve removed this one from the list:


The right fabric for this was originally tagged for a wrap top from Butterick, which I’ve used before.  I like the shape of the top and I have a gap in my wardrobe in terms of a red top.  However, the more I looked at the Burda magazine version the more I loved it.  I quit smoking just before Christmas and have put on a few kilos since then and I figured that the flowing/draping style might be more flattering until I’ve got rid of them.  The downside of using the red to make this Burda top is that I’ve already committed to the red top as project twenty of my fifty-two projects.  Not that I really committed to the fifty-two, but I am keeping an eye on the list, even if only to discipline me to use existing fabrics.

Re-thinking the fifty-two projects, if I consider the list as motivation to use existing fabric, then it is the fabric, rather than the pattern that I intended to use that is important. 

So I decided to re-brand project twenty “Red Lycra mock wrap top” as “Red Lycra top” and give myself permission to use the Burda pattern.

In fact, I’m glad I did as I really like this top. 


Compared to a simple T shirt it wasn’t difficult and I knocked it up in a morning.  I did change the pattern slightly, using a thin strip of Lycra, folded over, to bind the neck line rather than the facing that the magazine suggested.  I’ve never had much success with lycra facing.  It’s such a slippery fabric that it just doesn’t give the neckline any body and doesn’t take well to iron on interfacing.  In contract, binding the neck line with a slightly stretched strip of the same fabric tends to hold it close to the body and prevent any unintentional underwear displays.